INVITATION ORDERING GUIDE
Congratulations, darling!
It’s getting real, and you’re ready to invite your guests to your big day!
But before you do, we want to make sure we’ve covered all of the details of the invitation ordering process! Before placing your order, read up on our collections, print methods and paper types, and processes below to make this process as easy and stress-free as possible.
If you would prefer for us to personally assist you in building your wedding suite, we would be more than happy to do so!

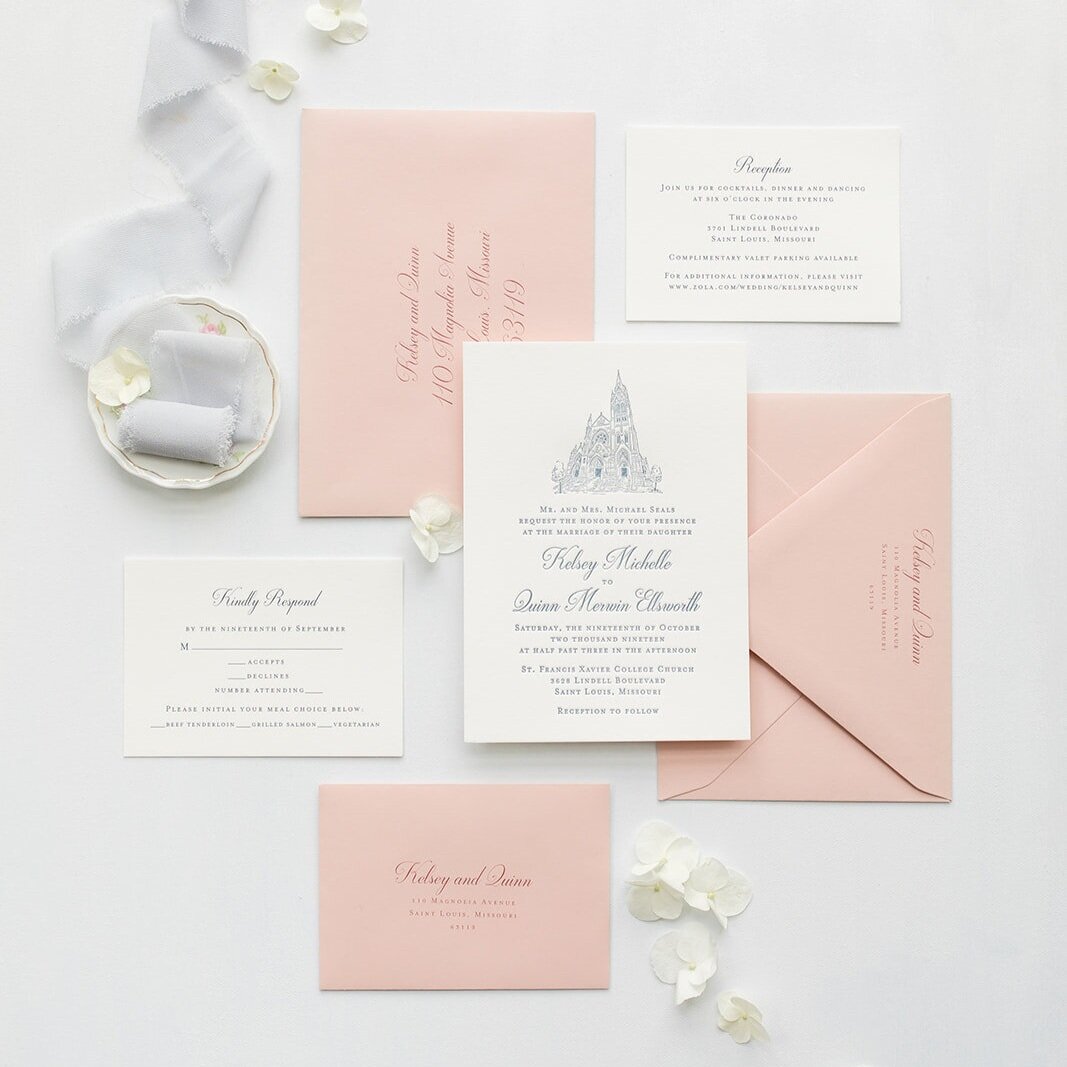


1. Selecting a Collection - Your Custom Artwork
Pop the bubbly! You have arrived at the most fun part of the process, selecting your collection suite!
We offer nine collection suites featuring custom artwork.
If you’re not sure which artwork style you like best, we recommend taking a look at examples of suites from each collection below. Because the artwork is created custom, every suite we create is one-of-a-kind!


2. Building Your Suite
The second thing to be considered when planning your wedding suite is the pieces that you will need within your suite. A traditional wedding invitation is made up of five pieces:


Although it is not required to include the fifth card, most couples choose to add a details card to include any of the following information:
Reception details (we always recommend adding a details card for the reception
information if the reception is held at a different venue than the ceremony)
Wedding website information (traditionally the website information would be on a separate card,
not on the main invitation)
Accommodations information
Travel details
Welcome party or rehearsal dinner details
Weekend itinerary
Many couples choose to combine two or more pieces of information (i.e. the reception details and the wedding website) on one card, while other couples will add a second (or even a third!) details card. We recommend that separate events be kept separate on their own card so that the details do not get overlooked amidst the other information.
We have a wording guide that we will send you at the beginning of the design process to help with examples of common invitation wording.
3. Selecting Print Method and Paper Type
We offer three printing methods:


Digital printing is flat printing that results in a smooth surface with no impression. We partner with one of the top printers in the industry to create digital prints with crisp color and impeccable detail. It beautifully prints watercolor artwork.
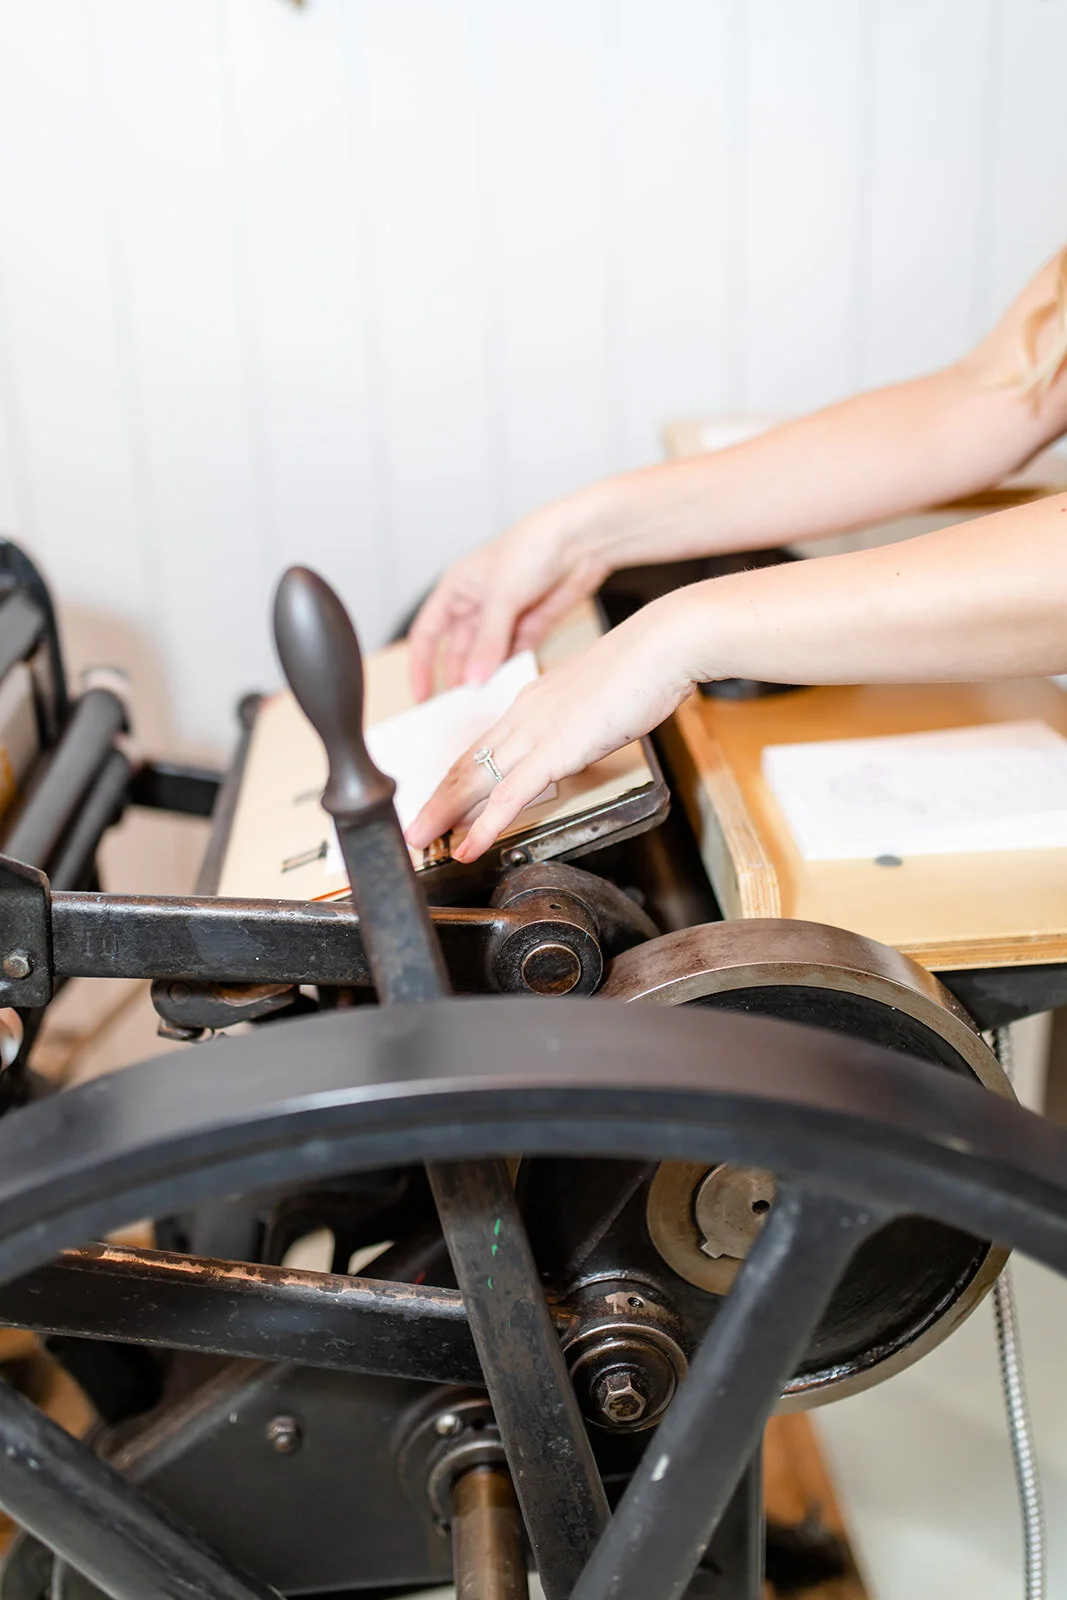
Letterpress printing is a timeless printing technique that involves having a custom plate made with your design which is ‘stamped’ with matte ink into cotton paper to create a tactile impression. It creates a beautiful impression with classic elegance. We do our letterpress printing in house on our 100-year old press Clementine which allows us to specialize in letterpress printing on handmade paper. We are able Pantone Match your ink to perfectly reflect your wedding color palette.
Foil printing is also a classic print method that involves a custom plate being stamped into paper, only this plate is made of copper and metallic foil is used in place of ink. The result is a beautiful stamped invitation with the shine of a metallic foil. Like letterpress, this print method will also leave an impression into the paper, however the impression is not as stark as it is with letterpress.
We offer three paper types:

Single-ply traditional paper
Double-ply traditional paper
Handmade paper
Traditional paper is offered in two weights: single-ply and double-ply. Traditional paper is manufactured with a straight edge and creates a consistent outcome for all of your invitations. It is offered in two colors: white and ivory.
Handmade paper is offered in a variety of colors and is one of most most popular and loved paper options, but it is important to understand the characteristics of handmade paper before deciding to purchase a handmade paper product (see below).


Characteristics of Handmade Paper:
Handmade paper is by nature a material that has quite a bit of variance. Each sheet of handmade paper is pulled individually by hand from a vat of pulp which creates inconsistencies in size, shape and weight of each piece. This is part of what makes handmade paper so beautiful and unique! It is and looks like it has been made by hand. We have rigorously vetted more than 20 different brands of handmade paper and the particular brands that we use have the highest quality and are the most consistent.
The variability of the handmade paper not only affects the shape and size of each sheet, but it also largely affects the printing process. When letterpress or foil printing on handmade paper, each sheet of paper must be registered by hand. Because the edges are not perfectly straight as a traditional paper would be, this can cause a slight inconsistency in the centering and registration of each piece. Essentially, these small variances are qualities that are innate to printing on handmade paper.
The only way to guarantee perfect consistency between each piece would be to choose a non-handmade, straight-edged traditional paper.
We (and so many of our clients) love and choose handmade paper for its totally unique, one-of-a-kind quality that most guests have not seen before, but it is important to be aware of the unique characteristics of handmade paper before choosing it for your wedding paper!
Production Time of Handmade Paper:
Because handmade paper is made by hand, it generally adds 3 weeks to the production process because the paper must be first ordered, then produced, and shipped to the printer. We would be happy to help you work out an estimated timeline with you. Please don’t hesitate to reach out to us here regarding timeline here:
If you would like to see the papers in person before ordering (which we highly recommend!), you can order a custom crest sample pack or a custom venue/landscape sample pack. (We will include a sample of each paper type in your pack).
4. Placing Your Order
QUANTITY
When determining your invitation quantity, it is important to keep in mind that the number of invitations that you will need is not the same number as the number of guests you intend to invite, but rather the number of households you will be mailing to. Once you have determined your quantity, we highly recommend ordering 10-15% additional invitations for your extras. You will want plenty of extra invitations for the following:
Photographer/videographer to capture on your wedding day
Keepsakes for your and your family
Last minute guest list additions
Any invitations that could be lost in the mail or are sent to guests who have moved, etc.
It can be very expensive per suite to order a small quantity of additional invitations after the original order has been placed. We do not want you to have to pay for the print processes to be completed again after you have placed your original order. It never hurts to have extra!
ORDERING
Once you’ve found the collection that you love, select your invitation quantity, print method, and paper type using the drop down menu on the product page and add the product to your cart.
MIXING & MATCHING: PRINT METHODS & PAPER TYPES
We have structured our products as à la carte items (meaning that you can mix and match paper types and print methods within a suite). We did this because so many of our clients wish to select different paper types and print methods for each piece of their suite.
For example, you may wish to select double-ply paper and letterpress printing for your main invitation, but prefer single-ply paper and digital printing for your rsvp card. You can also mix handmade paper and traditional paper within a suite, which is a very popular choice among clients.
After placing your order, you will immediately be prompted to complete the first steps of our design process — yay!

Pour yourself a glass of champagne, and we will walk you through the design process!
5. The Design Process
Once you have checked out, the design process begins!
Design Process Step 1: Complete the following forms with all of your information and preferences in our client portal:
Sign the Contract
Complete the Invitation Content Form
Complete the Design Preferences Form
Begin entering your addresses into the Addressing Template


Design Process Step 2: Custom Artwork Details
Depending on the collection suite you have selected, we will work with you to gather the appropriate details needed to create your custom crest, venue or landscape artwork.
Design Process Step 3: Proof One

Within two weeks of your forms being completed, we will send you your first proof of your entire invitation suite! You respond to the proof with your requested revisions. Revisions include grammatical, spelling, and minor artistic revisions. Revisions do not include the creation of entirely new, separate artwork. You have two rounds of revisions included within your design package. Every additional change to your proofs after the two rounds will incur a $50 fee per revision, billed separately.
Design Process Step 4: Address Spreadsheet
After thoroughly reviewing, you will upload your address spreadsheet to the client portal so that we can begin formatting your addresses to be set up for printing. We highly recommend having multiple people review your address sheet to check for errors, misspellings, etc. before uploading your spreadsheet to our site. We will allow up to 5 address corrections at no additional cost after we have set up your envelope files. Changes needed beyond 5 corrections will incur a $10 fee per revision, billed separately.
Step 5: Proof Two
We send you your second proof of your entire invitation suite and your envelope setup. You send back any final revisions.
Step 6: Final Proof
After your requested revisions have been made, we send you your final proof for approval before printing. Additional revisions needed beyond the two included rounds will incur an additional $50 fee per revision, billed separately before the invitations are sent to print.

Step 7: Production and Shipping:
Your invitations are sent to production! Once everything is ready we do a quality check on all items and then ship the invitations unassembled to you. Once you’ve received your invitations, it is time to assemble, add postage, and mail your fabulous wedding invitations to your guests! Yay!!!
Let’s get started!